At some point your turtle will outgrow even the biggest tank that you could fit in your room, if you want to keep your turtle you only have one option, to build a turtle enclosure. Or maybe you want to build an enclosure from the start, instead of keeping your turtle in a tank. In my friend’s case, it was the first case, so I decided to help him and do the research on what you have to do and to take into consideration when planning and building a turtle enclosure. I also decided to share the results of my research with you, so here it is.
Planning an Outdoor Enclosure
How much will it cost?
On average you can expect to spend at least 400-500 dollars on this. But every enclosure will be different so depending on what you want to build you could end up spending only 200 dollars or even more than 1000.
Choosing a good spot
Everything starts with a plan and this project is no exception. One of the most important things is choosing the location.
It will most probably be in your backyard, but where more exactly? You should choose a spot that has a good balance between light and shadow.
Turtles will need a lot of sunlight but occasionally they will to spend some time in the shadows to rest for a bit, so having the enclosure near the house so that there will be some shadow but also far enough that it doesn’t completely cover the enclosure.
A tree near or inside the enclosure will also do a great job. If you can’t build it near the house or there are no trees in your backyard you could always build a roof over it that just partially covers it.
Think about natural predators
As most animals turtles have natural predators who are a threat to them. So think about what predators could be in your area, they can be eagles, owls dogs, cats, foxes, raccoons, etc.
Taking into consideration the predators that can be found in your area will help you determine how high the walls should be, if a roof is required, or if any kind of extra security is needed.
The weather
Another important factor that you have to take into consideration before starting to build the enclosure is the weather.
If the weather is usually very cold in your area it might not be the best idea to build an outdoor enclosure. And what will you do with your turtle do during the winter, will you bring your turtle indoors for the duration of the winter or will you leave it outside to hibernate
If you want to leave it to hibernate you will have to make sure that it will have a very safe spot in which it can do so.
Designing an Outdoor Enclosure
After you are done with the planning phase and you have thought of everything is time for the next part, designing the enclosure. The first thing that you have to do is to measure the available space so you know what you are working with.
For this part, you can mostly let your imagination go wild, but you will still have to take a few things into consideration.
How much space is needed? Here I can’t say that there is a recommended space, just make it as big as you possibly can, no turtle will complain about having too much space. There is no rue that can tell you what the minimum requirement is. In general, you should make sure that your turtle will have enough space to swim and to walk around without feeling restricted.
Think about security. As I said there could be predators nearby and your turtle shouldn’t have to live in fear. So depending on the nearby predators add higher walls or a roof to the enclosure.
Turtles shouldn’t be able to escape. I think this one is obvious but I still want to remind you this because it’s easy to get over-enthusiastic about a really cool feature that you want to add to the enclosure and overlook the fact that it could provide an opportunity for your turtle to escape the enclosure.
It should be durable. Even if turtles won’t usually start charging into the walls of the enclosure to bring them down it doesn’t mean that it will be OK to make it flimsy.
Design a basking area. Turtles will usually choose the highest spot available for basking, so making a place a little higher than the rest will most definitely make that spot the basking area. And in case the weather in your area can get cold during some days think about incorporating a heat lamp in the design, just in case.
Make sure that the walls run deep. Turtles are able to and they will dig holes. If you don’t want your turtle escaping the enclosure you should plan some deep walls. Not very deep but they should be at least 1 or 2 feet deep.
Make sure your turtle has enough space to swim. Most turtle species spend most of their time in the water so your enclosure should be about 25% to 50% made out of water. I will get into more detail on how to make this part a little further in the article but in the beginning, you should make sure that you assign it enough space.
Think about splitting it into more parts. If your turtles are very aggressive toward each other you should think about separating them into two or more sections so they don’t have to meet.
Don’t rush the thinking process. Think carefully about how you will plant this enclosure because the well-being of your turtle will depend on it.
In this part, you should only think about how you want to do things only on a basic level and not concentrate on the decorations too much because things will probably change a little as you build them.
Choosing the Materials
Now that you have the plans set up it’s time to choose the materials. For the walls, you will probably have two options: wood or stone.
Using Wood to Build the Enclosure
Choosing Wood for the Enclosure
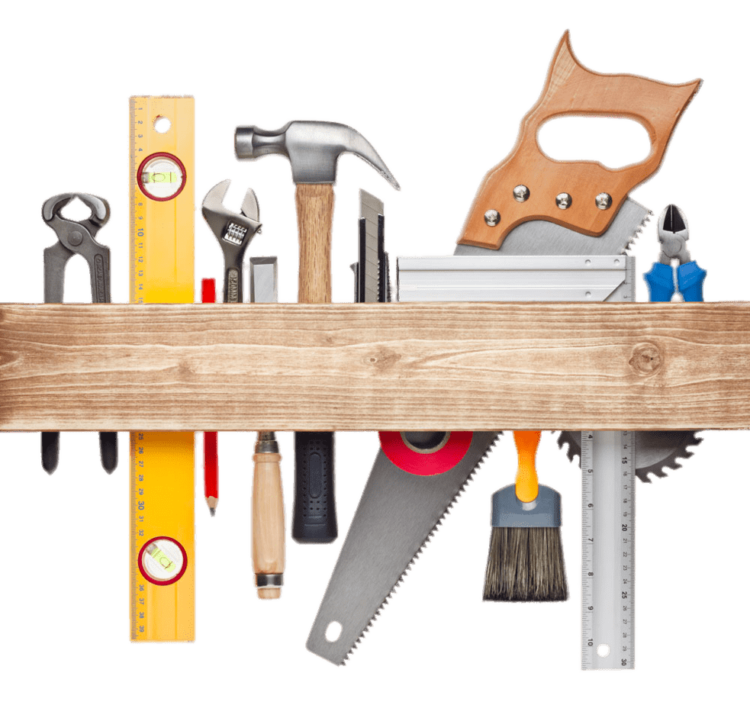
Wood is a great choice as a building material because it’s very easy to work with compared to other materials and you won’t need too many tools to build it. Depending on the complexity of your habitat you could just end us using a hammer, some nails, and a saw.
Wood is usually largely available but there are some types of wood that you have to stay away from.
Avoid cedar, pine, and eucalyptus wood. Turtles. and reptiles in general, who are exposed to those kinds of wood will end up having respiratory problems and they might also develop skin lesions. In general cedar wood is the worst of those three but pine and eucalyptus are also known to be bad.
Avoid chemically treated wood. When you are buying the wood ask if it’s been chemically treated. This is usually the case with most wood made for construction because it will increase its resistance to decay. Those chemicals are no problem for us humans but turtles are a lot more sense to them.
Also avoid using tree branches that have been sprayed with pesticides, even if they might make great decorations is not worth putting your turtle’s health at risk.
Treating the Wood
As you probably know turtles are really messy, they will poop everywhere and the water will start stinking in about two weeks, if not even faster.
And since the enclosure is outside it will have to take on the occasional harsh weather, like the rain. So to make sure that the enclosure will last for a long time you will have to treat the wood.
You could always replace bits of the enclosure as the wood starts to rot but it’s better to put a little more effort in the beginning and not have to always patch it up.
To waterproof the wood you will need to follow those steps:
- Find a dry and well ventilated area and make some space because you will have to leave the wood here for some time.
- Get some wood lacquer, some rough sandpaper and some fine-grit sandpaper.
- Use the rough sandpaper to sand the wood. During this step you will have to make sure that you remove any imperfections from the wood.
- Now it’s time to apply the first coat of wood lacquer.
- Leave the wood lacquer to dry. To make sure the wood is completely dry you should leave it overnight.
- Use the fine-grit sandpaper to sand the clean the first coat of lacquer.
- Add another coat and let it dry overnight.
- Add yet another coat and let it dry overnight. At this point depending on how hard or soft the wood is you can stop or apply some extra coats.
- After you apply the final coat you should leave the wood to rest for a couple of days before beginning to work with it.
Final Preparations
Now that the wood is all dried up and treated is time to cut it. Before you cut anything you have to do two things.
The first one is to redo your measurements, if you cut too many pieces to the wrong size you will have to start over with the treating process and that can add even an entire week of waiting.
The second and most important thing that you have to do before you start cutting is to get some safety equipment. You will need some safety glasses, so no piece of wood gets into your eye, some gloves to protect your hands, a respiratory mask, and probably some earplugs. I don’t know the size of your project so I am telling you the most essential pieces of protective equipment. If you will just have to cut 4 pieces of wood and you are done then you will probably be fine with a pair of gloves and some safety glasses. But if your project is bigger then you will require a lot more protection. You can get this kind of safety equipment at most hardware stores or you can get them from Amazon.
After you are sure that the measurements are right and you are completely protected is time to start cutting the wood.
Building the Turtle Enclosure
Start by marking the area where the enclosure will be. You can do this by placing some pillars in each corner and then connecting them with a string. The pillars don’t have to be very deep right now, you will have the chance to place them deeper soon enough.
Now take a shovel and start digging between the pillars and under the string. The width of the trenches should be about the same size as that of the shovel, this way you will have enough space to work and you won’t have too much to dig. The dept of the trenches should be at least half of the height of the wood boards that you are using.
After the trenches are done is time to place some support pillars. They should be placed in each corner and if the enclosure is very big they can also be placed between the corner pillars.
If you are not sure if the walls of the enclosure will hold up then just place a couple more pillars. Better be safe than sorry. The pillars have to be placed on a straight line otherwise your walls will end up being deformed.
Now place the wood inside the trenches and fixate them with some nails to the pillars. The sharp end of the nails should be facing the outside of the enclosure, eventually, you will cut the extra parts of the nails out if they are too big, but until then be very careful when you are walking near them.
Now the walls are almost finished. All you have to do is to check if they feel sturdy enough. Because you haven’t filled the trenches back they won’t be at their very best but you should get a general idea if they will hold up over time or if you have to secure them even more. If they don’t feel very secure then you could add some pillars and nail the walls to them for extra support.
When you think that your walls are sturdy enough is time to fill the trenches back. For extra support, you could add some rocks when you are filling them with earth. This way the ground will offer a lot more support to the walls.
At this point, you are done with one of the hardest parts but don’t think that it’s over because you still have to dig to make room for the water. But before that, I will cover what you have to do if you want to use stone for the enclosure walls.
Now it’s time to build the pond. There are two ways in which you can do this, but each method requires you to dig a hole so there is no escaping that part.
The first option is to fill the hole that you dug with liner and then to fill it with water. Liner is a kind of plastic that is UV and puncture resistant so it will last for a very long time it’s also beneficial for microbial growth. Liner is very easy to use all you have to do is to place it inside the pond, make sure that it’s evenly spread, and then use some rocks to make sure that it won’t move. After that, you can just fill the hole with water. To find out how much liner you will need you can use some old sheets that you have lying around to measure, or you could just simply use a tape measure. Here is a link to Amazon from which you can get some liner.
The other thing that you could do is to use a preformed pond, which is basically just like a big bathtub that you place inside the ground and there is no draining pipe. I have never used one nor do I know anybody who used one so I can’t give any opinion on it but from what I’ve read online I can see that people are usually pretty happy with them and so are the turtles so you could always give it a try. Here is a link to one preformed pond that I found online that had good reviews: link.
At this point, your outdoor turtle enclosure is basically built, of course, that there is to decoration part and you might want to build some extra features like a roof but the essential parts are done.
Using Stone to Build the Enclosure
I use the word stone as a general term you can use: bricks, cement or whatever kind of stone will look good in your backyard.
This part is very similar to building a wall for a house, a field where I don’t have too much experience but during my research, I found how to do things so I will give you some general good tips and I am also going to point you to other good sources that can walk you through the entire building process.
Choosing the Materials
Regardless of what you choose you should make sure that they will be resistant. Some building materials are designed to be used for indoor walls. They will also do a good job while they are outside but they will degrade faster and will need more maintenance than others that were designed for exterior use. If you are not sure what to choose you can always tell the person at the store what you want to do with the materials and he will tell you which of them are better suited.
Final Preparations
Gain you have to make sure that your measurements are right and that you also have all the required equipment, working with stone requires a lot more equipment than wood, and also a lot more protection gear in need. Again here is a link to Amazon where you can get all the protection equipment you need.
Building the Outdoor Stone Enclosure
For this part, I am going to give you a couple of general tips and then point you to a couple of videos that will walk you through the entire building process.
Here are the tips:
- When you are building it you have to make sure that it’s completely stable, you don’t want any of the pieces falling over your turtle.
- You should make sure that there are no sharp edges in which your turtle can get cut.
- Be patient and leave the wall at least a couple of days to harden before you put your turtle inside.
- Make sure there are no small pieces that are detachable, there are reports of turtles who have tried to eat small rocks for some reason or another.
- In general you don’t to build the walls too deep but turtles will occasionally try to dig under the walls so make sure that you have something there, like some wood to stop them.
Here you will find a video on Youtube that will show to build a concrete wall, and here is one that will show you how to build a stone wall. I haven’t built a wall stone or concrete wall but after watching those two videos I am confident that I can build one and I am confident that you will also feel that way,
How to Secure a Outdoor Turtle Enclosure
Now that you’ve built the walls and the pond it’s time to take some security measures.
When choosing between security measures you have to take three things into consideration. the possible predators that can come after your turtle, the efficiency of the security, and finally the aesthetics of it. You might think that aesthetics shouldn’t be on this list but some security measures can be very efficient but will also completely ruin the way the enclosure looks. As you will read through the article you will see what I am talking about.
A Steel Net
This is probably the most efficient way to protect your turtle. But it will also look very sad, even if you built the enclosure for the well-being of your turtle it will make it seem like a prison. And your turtle will feel the same way, even if your turtle had no use for the space above her, having it covered with a steel net will most definitely make it feel captive and sad.
A Textile/Plastic Net
Even if it’s not as safe as a steel net it still provides a good amount of protection. You can also get a transparent one which will make that prison-like look disappear.
A Small Electric Fence
You can place a small electric fence that will keep away any animal that would want to invade your turtles privacy. Small electric fences are designed to keep pests away, not to hurt them badly, they will only feel a small shock that will make them want to stay away from that place so you shouldn’t worry about their safety. The shock they will feel is very similar to the one from those annoying electric shocking gum packs. The fence should be placed on top of the walls for the best results. Here is a link to Amazon for the electrical fence that my friend bought for his enclosure: AC-Powered Electric Fence Kit for Pets and Small Animals. From what he told me the fence forks really great and has managed to keep his cat away from his turtles, without hurting the cat.
Build a Small Cave
Building a small cave can be great for security and aesthetics as well. It doesn’t have to be something very complicated you can use a few bigger rocks and arrange them so that your turtle can hide under them if it feels in danger. Just make sure that the cave is stable.
Don’t Covering It With Glass or Clear Plastic
This is a very bad idea, first of all, glass can easily break and hurt the turtles, and secondly, most transparent materials won’t let any UV light get through. But if you want to do this because you have no other alternative use anything except glass and set up a couple of UV lights inside the enclosure.
Decorating the Outdoor Enclosure
The decoration part is mostly up to you and your tastes, I am only giving you some tips that will guide you through the process.
Incorporate Fruits and Vegetables
Try adding some vegetables or plants to the enclosure. This way you will combine something that is useful with something that is aesthetically pleasing.
Avoid Toxic Plants and Flowers
There are certain plants and flowers that are toxic for turtles and you should never let them grow in the enclosure. You can find a list of those plants and flowers in this article What Do Turtles Eat?
Avoid Artificial Things
Avoid using artificial substrates and artificial plants in the enclosure. First of all the artificial plants can easily mix up with the real one and your turtle will eat them thinking they are real. And secondly, why would you want to use anything artificial since you are building the enclosure outside and you can use the real things.
Use Some Rocks
Get some bigger rocks and place them in the enclosure, your turtle will find them useful for basking, and when they are shedding and they will also look really good.
Put Some Fish in the Pond
They will serve both as decorations and as food for your turtle, just don’t put too many in there because the pond can become overpopulated and your turtles won’t be able to use it. A couple of small fishes should be just enough.
Incorporate Some Heat Lamps in the Decor
Heat lamps will be really useful in the colder days when the temperature is not optimal for your turtles. You don’t have to always keep them on, you can have them set to go on for a couple of hours every day or you can just turn them on when you think it’s a little too cold for your turtles. You can find more information about this in the article: Guide for Lighting and Heating a Turtle Tank and Basking Area.
Try Making Different Sections
You can split the enclosure into 3 parts, for example, one can be a jungle-like area with a lot of dense vegetation, one can be the one with the pond and another one can be a desert-like area with sand on the ground and very little vegetation and a lot of rocks. Or you can choose whichever themes you like. Those sections are not there only for the looks, they can also have a purpose. In my example, the jungle area can be very useful for the turtle to find food and to hide and also find a cool area if the weather gets too hot. The pond area is self-explanatory and the desert area will be perfect for basking since there will be high rocks and sand which is excellent at retaining heat.
Don’t Go Overboard
Try not to go overboard with decorations so you don’t end up filling the place with decorations and your turtles have little to no place for walking.
Conclusion
I hope you’ve found this article helpful or at least inspiring. I wish you the best of luck with your building project and share some pictures with us when you are done.
If you’ve built a turtle enclosure before sharing some tips with us in the comment section, or tell us how your construction process was.
And if you have any questions don’t hesitate to leave a comment and ask, I will try to answer them as soon as possible.
Hello,
If you enjoy the content that we create, please consider saying a "Thank You!" by leaving a tip.
Every little bit can help us tremendously in continuing to create quality content that helps turtle and tortoise owners around the world.
We really appreciate the kindness and support that you show us!
That’s so great! Thank you so much! I was wondering, are the fish I put in the pond alive for my turtle to eat or are they raw dead pieces of meat? And, is the enclosure in need of a heat lamp if it’s outdoors?
Hello Jowanne,
The fish should be alive, turtles like chasing them around, and it’s a good exercise for them. As for the basking area, if the enclosure is outdoors and it’s not completely covered, you shouldn’t need one.