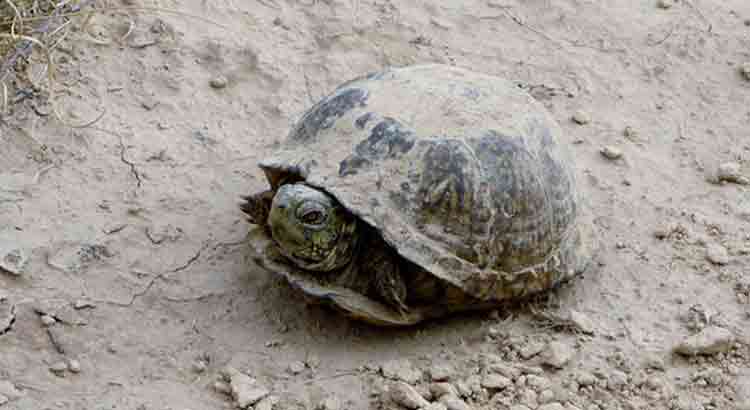
This is something that can happen to a lot of new turtle owners, for an unknown reason the shell of your turtle looks dry. This can look quite bad but fortunately, this is not a health problem, and it can be solved quite easily. And it should be, if you let it like this it can end up causing serious health problems.
A dry turtle shell is caused by hard water and mineral deposits, retained scutes, or bad humidity levels. In order to cure a dry shell, you need to find the cause of the problem and make adjustments to the tank or the basking area.
Now, let’s dive straight into the problem and take a look at each possible cause, and see what you can do to fix it.
Hard Water and Mineral Deposits
The most common problem is hard water, meaning water that has a lot of calcium and magnesium in it.
The good part is that those extra minerals are completely safe for humans and turtles, and the only downside to them is the fact that they can make the shell look drier than it actually is.
This problem is especially common in the western half of the United States, in states such as Texas, Oklahoma, Utah, Nevada, etc. where the water tends to have more minerals.
While the minerals are not a problem, you still want to get rid of some of them, in order to get your turtle’s shell back to normal. And the only way to do this is to treat the water.
But, before doing so you first want to test the water to make sure that this is the problem. And you can easily do that by using those strips: Aquarium Test Strips 6 in 1, this kit contains 100 strips, so it should last you for a couple of years. Or you can use whatever kit that you like, as long as it measures the hardness of the water. But my advice is that since you are already testing the water, to test as many things as possible.
And speaking of, here are the levels that you want to have in your turtles’ tank:
- pH between 6 and 9
- Chlorine and ammonia level of 0
- Nitrite level of < .5 ppm
- Nitrate level of < 40 ppm
If the hardness of the water is the problem, you can easily solve this problem by treating it. For the past few years, I’ve been using API products, to lower the hardness and the chlorine levels of my water, and the results have been great, so I would recommend you to check out their Amazon Store Page if you need any treatment for your water, there you will find hardness, chlorine treatments, pH treatments, and many more.
Retained Scutes
Turtle shells are covered by scutes, which are an extra protection layer for the shell. And unlike the rest of the shell, they are made out of keratin (the same thing our nails are made out of), and over time they will fall, and new ones will grow back.

But sometimes they don’t completely fall off, and this can give the shell a dry aspect.
Very important to remember. Never remove the scutes with your hand, it will hurt the turtle and can cause injuries. As tempting as it might be to remove it and be done with it, you shouldn’t do it. They have to fall on their own.
This problem is usually caused by a problem in the basking area.
A basking area has 3 main parts a platform, a heat bulb, and a UVB bulb. The platform is just a platform on which the turtle can sit, but the bulbs are a little bit more complex and if you don’t get them just right they can easily make the shell of your turtle look dry.
How to Choose the Best Heat Bulb for Your Turtle
There is no such thing as a general best wattage, but there is the best wattage for each specific situation. So let’s figure out what is the best wattage for you.

In order to give an answer that will fit your setup and your turtle, we need to know two things.
The first is what temperature you can expect from a light bulb at certain distances. And second, what turtle species do you have.
Now, let’s start with the first.
Here is a chart that I made showing what temperature you should expect to achieve using different powered light bulbs at certain distances.
| 50 W | 50 W | 75 W | 75 W | 100 W | 100 W | 150 W | 150 W |
| Distance | Temperature | Distance | Temperature | Distance | Temperature | Distance | Temperature |
| 4 inches | 104°F | 4 inches | 120°F | 4 inches | 131°F | 4 inches | 144°F |
| 8 inches | 81°F | 8 inches | 91°F | 8 inches | 113°F | 8 inches | 131°F |
| 12 inches | 73°F | 12 inches | 81°F | 12 inches | 90°F | 12 inches | 126°F |
To make this chart I used a laser thermometer and the average temperature of the room was 75°Farenheit (24°Celsius), so you might get slightly different results depending on the temperature of your room, but unless the difference is massive the temperature of the basking area should be similar.
As for the bulbs, I’ve been using these bulbs for a few years, but from my experience, all heat bulbs are very similar, so you can use whichever you like the most. But, make sure to avoid mercury vapor bulbs, I will explain shortly why,
Now that you know what temperature to expect from a heat bulb, based on distance and wattage, it’s time to see what temperature you actually need.
Overall most turtles require a similar temperature range, but if you want to get into detail, they are slightly different. And here is a list of the most common pet turtles and their ideal basking area temperatures:
| Turtle Species | Temperature Fahrenheit | Temperature Celsius |
| Red Eared Slider | 90 – 95°F | 32 – 35°C |
| Juvenile Red Eared Slider | 95 – 100°F | 29 – 37°C |
| Box Turtle | 80 – 90°F | 26 – 32°C |
| Juvenile Box Turtle | 90 – 95°F | 32 – 35°C |
| Map Turtle | 75 – 80°F | 24 – 26°C |
| Juvenile Map Turtle | 80 – 90°F | 26 – 32°C |
| Mud Turtle | 90 – 95°F | 32 – 35°C |
| Juvenile Mud Turtle | 90 – 100°F | 32 – 37°C |
| Musk Turtle | 85 – 90°F | 29 – 32°C |
| Juvenile Musk Turtle | 90 – 100°F | 32 – 37°C |
| Snapping Turtle | 90 – 95°F | 32 – 35°C |
| Juvenile Snapping Turtle | 95 – 100°F | 29 – 37°C |
| Pond Turtle | 85 – 95°F | 29 – 35°C |
| Juvenile Pond Turtle | 90 – 100°F | 32 – 37°C |
| Cooter | 80 – 85°F | 26 – 29°C |
| Juvenile Cooter | 90 – 100°F | 32 – 37°C |
As you can see juvenile turtles, which means younger turtles that can’t be classified as adults, will require a temperauter that is slightly higher than that of an adult, but overall the difference is not that significant.
How to Choose the Best UVB Bulb for Your Turtle
When it comes to choosing UVB bulbs things are a little more complicated due to the huge variety of wattages, in which UVB bulbs can be found. And then there is the fact that most manufacturers have a different rating system, and some of them have no instructions at all.
So, for UVB bulbs, I am going to give you the exact distance for a few bulbs that I’ve used before that come from a reputable manufacturer, and I will provide links to Amazon, where you can get them.
| Zoo Med | |
| UVB Bulb | Distance |
| ReptiSun 5.0 Mini CFL | 5 inches |
| ReptiSun 5.0 CFL | 7 inches |
| ReptiSun 10.0 Mini CFL | 7 inches |
| ReptiSun 10.0 CFL | 10 inches |
| ReptiSun 5.0 T8 Linear | 6 inches |
| ReptiSun 5.0 T5 Linear | 8 inches |
| PowerSun 80W | 7 inches |
| PowerSun 100W | 10 inches |
| PowerSun 160W | 22 inches |
And in case you have something between the UVB bulb, like a net, or a grill, you want to move the bulb closer by one inch, as anything in between the turtle and the bulb will reduce the amount of UVB rays.
One more thing to keep in mind is that UVB bulbs will stop producing UVB rays, way before they will stop producing light. On average I would say that a UVB bulb only produces UVB rays for only half of its lifespan. I measured the amount of UVB light produced by the bulbs and noticed that after about 6 months, the amount drops considerably, so I change my light bulbs at around 6 months, and I would advise you to do the same.
And if you want to measure how much UVB light your bulb produces you can use this device. While it’s a little bit expensive, overall it will save you money since you will know exactly when the bulbs run out of UVB light, and it will help your turtle remain healthy. But it’s not a requirement.
Humidity Levels
For most aquatic turtles like red-eared sliders, mud turtles, map turtles, etc. humidity is not a problem since they mostly live in water, but in the case of land turtles, like the box turtle, and tortoises, the lack of humidity can cause a dry shell.
To see if this is your problem simply get a humidity meter, like this one, and measure the humidity in the enclosure. On average you want to have a humidity of 60%.
And the best way to obtain that humidity is to simply get a spray bottle, fill it with water, and when the humidity drops below 60% just spray some water over the enclosure. It’s that simple.
If your enclosure has problems keeping the required humidity level then you most likely need to change the substrate. Some substrates are better at maintaining the humidity level than others.
If you want to know which is the best humidity level and the best bedding for a specific tortoise species you should check out this page, where you will find articles for different tortoise species.
Final Thoughts
One very important thing that you should know is that you shouldn’t apply any oil or conditioner to the shell, as these products can trap bacteria and fungus on the shell which can cause problems.
If you follow the instructions in this article your turtle’s shell will get back to normal in a few weeks. And you will also have solved a problem that in the future could have caused some real health concerns.
If there is anything else that you would like to know about turtle shells or anything else about turtles you can always leave a question in the comment section below and I will answer you as soon as possible.
Hello,
If you enjoy the content that we create, please consider saying a "Thank You!" by leaving a tip.
Every little bit can help us tremendously in continuing to create quality content that helps turtle and tortoise owners around the world.
We really appreciate the kindness and support that you show us!